Friday, August 21, 2009

Friday Recipes: Chocolate Chip Cookies

You don't have to say chocolate chip cookies to me twice, I am there! I love chocolate chip cookies, and all the variations that go along with them. You go to the grocery store and there are baking chips of every flavor; dark chocolate, white chocolate, mint, butterscotch, peanut butter, cinnamon, and more. 

You can, of course, find the famous Toll House cookie recipe in the back of a bag of Nestle chocolate chips, but I've put together quite a few variations for you to try below. Several from Old Fashioned Living, and a sampling of tried and true recipes from the blogging world. 


Fun Historical Fact: The phrase "Toll House" comes from the restaurant that the creator of the Toll House chocolate chip cookie recipe owned and operated. Her name was Ruth Graves Wakefield and she and her husband ran the Toll House Restaurant in Whitman, MA. The building itself was built in 1709 and was used as a toll house where passengers ate while the horses were changed on the way from Boston to New Bedford. There's a few tid bits of information on Wikipedia for your reading enjoyment, but if you really want to read about The Toll House and glean a bunch of recipes from Ruth Graves Wakefield herself, then check out the book Toll House Tried and True Recipes.

Ruth died in 1977, and the Toll House Inn burned down from a fire that started in the kitchen on New Year's Eve 1984, but her cookie still lives on. The inn was never rebuilt and the site is now honored with a historical marker. There are a number of manufacturers of chocolate chips today, however the agreement to publish the recipe of Ruth Graves Wakefield on the back of each package of Nestlé Toll House chocolate chip cookies is still honored as of 2009.


White Chocolate Chip Cookies

1/2 cup butter, room temperature
4 ounces cream cheese, softened (1/2 package)
1 tablespoon milk, half and half or cream
1 cup granulated sugar
1/2 tsp. vanilla extract
1/4 tsp. orange extract (optional)
1 cup all purpose flour
1 cup white chocolate chips
1/2 cup chopped pecans, or macadamia nut (optional)

Heat oven to 350 degrees. Cream the butter, cream cheese and milk in medium bowl at medium speed until well blended. Beat in sugar and vanilla. Mix in the flour. Stir in nuts and chocolate chips. Drop level measuring tablespoonfuls of dough 2 inches apart onto ungreased baking sheet, covered with parchment paper. Bake at 375 for 10 minutes. Remove to cooling rack. Makes about 3 dozen cookies. These were very soft when first done, so I left them on the pan for ten minutes or so, then transferred to finished cooling. I also did not use the nuts-my son doesn't like them, and these were his request for the classroom party! They turned out great.


Mini Chocolate Chip Cookies

1 cup all-purpose flour
1/2 teaspoon salt
1/2 cup butter, softened
1/2 cup granulated sugar
4 ounces cream cheese, softened
1 large egg
1 teaspoon vanilla extract
1 cup mini semi-sweet chocolate chips

Preheat the oven to 350 degrees. Lightly grease cookie sheets or spray lightly with cooking spray. Sift the flour and salt into a small bowl. Beat butter, sugar, cream cheese, egg, and vanilla extract in a bowl until creamy. Gradually beat in flour mixture. Stir in mini chips. Drop by rounded tablespoon onto prepared baking sheets. Using your fingers or the back of a spoon, slightly shape and flatten the dough. I found the cookie looked much nicer when I did this. Bake for 10-12 minutes or until lightly browned. Cool on baking sheets for 5 minutes; remove to wire racks to finish cooling.


Oatmeal Butterscotch Cookies With A Twist
Makes approximately 44

2-1/2 cups all purpose flour
1 tsp. baking powder
1 tsp. baking soda
1/2 tsp. salt
1 cup butter (2 sticks)
1 cup packed brown sugar
1/2 cup granulated sugar
2 large eggs
1 Tbsp. + 3 tsp. Frangelico or Amaretto liqueur
1-1/2 cups butterscotch chips
3/4 cup oatmeal
1/3 cup walnuts, chopped

Combine flour, baking soda, baking powder and salt and blend well.
In a large mixing bowl on medium speed, beat butter and sugars until creamy.

Beat in eggs and Frangelico or Amaretto liqueur. Reduce speed to low and mix in flour until blended. Stir in butterscotch chips, oatmeal and nuts. Drop by tablespoons 2 inches apart on an ungreased baking sheet. Bake 10–12 minutes or until golden around the edges.

Let cookies firm up on the cookie sheet for approx. 3-4 minutes then place them on a wire rack to cool.

These cookies will save for up to 1 week in an air tight container 2 months in the freezer.


Pumpkin Chocolate Chip Cookies

1 1/2 cups canned solid pack pumpkin
2 tbsp. milk
2 eggs, beaten
2 cups granulated sugar
1 cup vegetable oil
4 cups flour
2 tsp. baking soda
4 tsp. baking powder
1 tsp. salt
1 tsp. vanilla extract
2 tsp. ground cinnamon
6 oz. chocolate chips
1 cup chopped walnuts (optional)

Mix all dry ingredients together and add to the remaining ingredients and mix well. Drop by teaspoonfuls onto cookie sheet. Bake at 350 degrees for 10-12 minutes.


Outrageous Chocolate Chip Cookies

1 cup margarine or butter
1 cup sugar
2/3 cup packed brown sugar
1 cup peanut butter - I used half crunchy and half smooth
1 teaspoon vanilla
2 eggs
2 cups flour
1 cup quick-cooking or old-fashioned oats - I used old-fashioned and used and additional 1/4 cup.
2 teaspoons baking soda
1/2 teaspoon salt - I didn't use
1 (12 oz.) package of semi-sweet chocolate chips

Heat oven to 350F. Beat margarine, sugars, peanut butter, vanilla and eggs vigorously in large bowl until creamy and well blended. Stir in flour, oats, baking soda, and salt. Stir in chocolate chips.

Drop by rounded tablespoonfuls about 2 inches apart onto an ungreased cookie sheet - I used parchment paper.

Bake 10 to 12 minutes (I baked for 10 minutes) or until golden brown. Cool one minute and then move to wire rack.


Cookie Decorating, Storing and Shipping Tips


Some Great Blog Posts:


Maple Walnut White Chocolate Chip Cookies

1/4 cup butter, softened
1 cup packed brown sugar
1/4 cup pure maple syrup (not flavoured pancake syrup)
1 large egg
1 tsp. vanilla or maple extract
1 1/2 cups all-purpose flour
1 tsp. baking soda
1/4 tsp. salt
3/4 cup each white chocolate chips/chunks and chopped walnuts

To get the instructions click here


DoughMessTic Chocolate Chip Cookies

1 cup plus 1 Tbsp. Bread Flour
1 cup plus 1 Tbsp. All Purpose Flour
1/2 tsp. Baking Soda
1/3 tsp. salt
1/2 tsp. ground coffee
1 1/2 sticks half melted butter (12 Tbsp)
1/2 cup Dark Brown Sugar
1/2 cup Light Brown Sugar
1/2 cup Vanilla Sugar
1 Large Egg and 1 EggYolk
2 tsp. Vanilla
1/2 cup SemiSweet Chunks
1/2 cup Milk Chocolate Chips (regular sized)
1/3 cup Bittersweet Chips
1/3 cup White Chocolate Chips
1/3 cup Chopped chocolate bar with Nuts (I used one with hazelnuts)
Sea Salt (to top)

To get the instructions click here
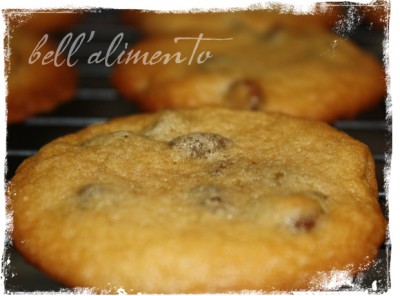


Choco Chip Cookies

2 1/4 cup all purpose flour - sifted
1 tsp baking soda
1 tsp kosher salt
2 sticks real unsalted butter - softened
3/4 cup granulated sugar
3/4 cup packed brown sugar
1.5 tsp PURE vanilla extract - I use Madagascar pure vanilla extract, it’s a little pricey but worth it
2 large eggs - room temperature
1 cup semi sweet chocolate chip morsels - I like ghiardelli

To get the instructions click here


Captain Morgan Chocolate Chip Cookies

2 1/4 cups all-purpose flour
1 teaspoon baking soda
1 teaspoon salt
1 cup (2 sticks) butter, softened
3/4 cup granulated sugar
3/4 cup packed brown sugar
1 teaspoon vanilla extract
2 large eggs
2 cups (12-oz. pkg.) NESTLÉ® TOLL HOUSE® Semi-Sweet Chocolate Morsels
3 tbsp Captain Morgan Original Spiced Rum; retain some extra for “basting”

To get the instructions click here


Outrageous Chocolate Cookies

8 oz. semisweet chocolate, roughly chopped (or use semisweet chips and you won’t have to chop the chocolate)
4 tbsp butter
2/3 cup all-purpose flour
1/2 tsp baking powder
1/2 tsp salt
2 eggs
3/4 cup light brown sugar, packed
1 tsp vanilla
1 12-oz package semisweet chocolate chunks

To get the instructions click here


Pumpkin Chocolate Chip Cookies

1 c. sugar
1/2 c. vegetable oil
1 egg, beaten
1 c. pureed pumpkin
1 tsp. milk
1 tsp. vanilla
2 c. flour
1/2 tsp. salt
2 tsp. baking powder
1 tsp. baking soda
1 tsp. cinnamon
1 c. chocolate chips

To get the instructions click here


Washington YWCA Chocolate Chip Cookies

1/2 c. (1 stick) butter
1/2 c. vegetable shortening
1 c. granulated sugar
1/2 c. brown sugar, packed
2 eggs
2 tsp. vanilla
2 2/3 c. flour
1 tsp. baking soda
1/4 tsp. salt
1 c. chopped walnuts (optional)
1/2 c. flaked coconut
2 c. (one 12-oz. pkg.) chocolate chips (I use semi-sweet)

To get the instructions click here


Award-Winning Soft Chocolate Chip Cookies
With undying gratitude to Debbi on allrecipes.com

4 1/2 cups all-purpose flour
2 teaspoons baking soda
2 cups butter, softened
1 1/2 cups packed brown sugar
1/2 cup white sugar
2 (3.4-ounce) packages instant vanilla pudding mix (you could also use chocolate pudding for chocolate-y cookies ... but vanilla's my favorite)
4 eggs
2 teaspoons vanilla extract
4 cups semisweet chocolate chips
2 cups chopped walnuts (optional, I never use 'em)

To get the instructions click here
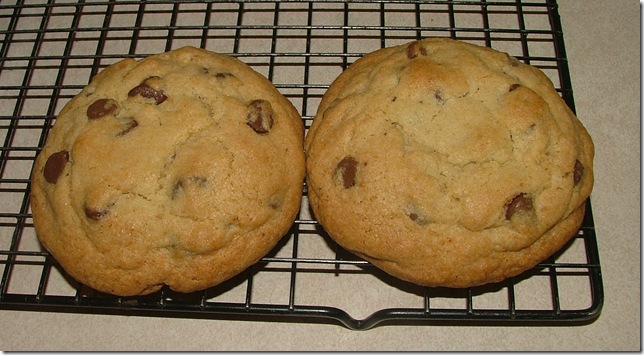


Amazing Hard Boiled Egg Chocolate Chip Cookies

12.4 oz all purpose bleached flour (2 ¾ cups spooned and swept)
8 ounces cold unsalted butter, cut into small chunks (16 tablespoons or 2 sticks)
1 teaspoon salt
1/2 teaspoon baking soda
3/4 cup granulated sugar
1/2 cup brown sugar
1 large egg, lightly beaten
1 hard boiled egg, cut into big chunks (Update: it's now been tested using only hard boiled egg (2) and is even better!)
1/2 teaspoon vanilla extract
1 package or 2 cups semi-sweet or milk (or a combo, which is what I do) chocolate chips

To get the instructions click here


The Ultimate Chewy and Soft Chocolate Chunk Cookies

1 cup unsalted butter at room temp
1 cup tightly packed light brown sugar
1/2 cup granulated sugar
2 large eggs
1 1/2 tsps. pure vanilla extract
3 cups plus 2 tbsp. all-purpose flour
1 tsp. baking soda
1/2 tsp. salt
16 oz. flavorful bitter or semi-sweet chocolate, coarsely chopped

To get the instructions click here

Thursday, August 20, 2009

How to Start a Book Club Tea Group

Editor's Note: Tamara has provided us with another wonderful Tea Time idea! Click on the Name of the books mentioned for more information on the title or series.

What is a book club? A group of people who want to read the same book over a given period of time and then come together to discuss it.

Where does the tea part come in? Some groups like to meet at coffee or tea houses, churches, or even restaurants. Some groups prefer a setting a bit more casual, and choose to meet in someone's home. This can be the same individual's home each meeting time, or it can rotate amongst the group members. The host gets to choose the refreshments, so if your group loves coffee, perhaps you each host a coffee in your home; if your group prefers tea, then afternoon tea is served.

This is how the book club I attend, the Augustus Snodgrass Book Club, usually goes about our book club meetings. One person from the group decides to host the tea. They then get to choose the book and the date (around six weeks from the last one). They send out the invitations to all of us. We all read the book and show up for tea at the hostess's house on the appointed day. We have tea and discuss the book. Our group really loves to read and is GREAT about getting onto a lot of interesting, interpretive questions and discussions. So far we have read The Lion, the Witch and the Wardrobe and The Great Divorce both by C.S. Lewis, Little Women by Louisa May Alcott, Pride and Prejudice by Jane Austen, Silas Marner by George Eliot, The Brothers Karamazov by Fyodor Dostoyevsky, Watership Down by Richard Adams, To Kill a Mockingbird by Harper Lee, Tuesdays with Morrie by Mitch Albom and right now we are reading Cry the Beloved Country by Alan Paton. Our group tends to be fairly literary in our choices (thus our name, The Augustus Snodgrass Book Club), but other book clubs often read best sellers, or new releases. You can even have a book club that chooses to read books within a specific genre, such as mysteries, biographies, science fiction, fantasy or theology. It just depends on the members and what they want to read.

The Tea Table

As for the tea table, that varies according to each member's personality. Sometimes tea times are very proper and other times they are quite informal. It really doesn't matter as long as the atmosphere lends itself to fun, fellowship and conversation. You might even want to add some whimsy to your tea time and bring in some themes from your book:

Silas Marner - linen table cloths and napkins; sprinkle chocolate gold coins around the table; display flowers in a brown jug. Send linen bags of chocolate coins home as favors.

Lion, the Witch and the Wardrobe - you must serve Turkish delight, welsh rarebit and English tea. What about displaying or sitting things around in an antique amoire?

The Brothers Karamazov - Russian tea with lemon, served from a Samovar would be just stunning! Russian tea cakes would be a must.

Cry the Beloved Country - Cover the tables in African cloths. Serve African tea (I prefer Kenyan tea, but the novel is set in South Africa.) Set wooden animals around. If you are crafty, find or paint a ceramic tea pot with zebra stripes or giraffe or leopard spots. If you could find inexpensive tea cups, that would be fun too! Serve tea in your garden.

Tea Favors

Tea favors are optional. You might have one or two larger ones to give away as door prizes; one drawing for just coming, and one drawing for everyone who finished the book. Here are some ideas for book and tea favors, but you might consider some that go better with your theme:

  • Tea cup candles - these are easy to make and can be quite inexpensive if you find you tea cups at garage sales or the good will.

  • Tea cup pincushions - these would be fun to give away with a book like Little Women.

  • Tea cup or tea pot flower arrangements - individual tea pots are quite small and make delightful little flower arrangements. We have found them at discount stores for as little as $1 each!

  • Old Book Centerpieces - garage sales and the good will again. Find some nice looking old books and decorate them with a little gold paint, or gilding. Then, cover with ribbons, flowers, lace, and doo-dads. A little creativity goes a long way!

  • Bath teas and truffle soaps - these are fairly easy to make with a few herbs, essential oils and some sealable tea bags. The truffle soaps take a little more skill.

  • Tea cup or Tea pot chocolates or cookies - Brown Bag cookie molds have some cute tea pots that can be used to mold chocolate for gifts, not just for cookies. Wrap them in a cellophane bag and tie a ribbon and some flowers around it.

  • Book markers - these can be made from almost anything and can cost very little!

Finishing Touches

At the end of the tea, the next host announces the next book title and the next tea time. That way we can all rush out and get a copy of the book on our way home! For order's sake, you may want to have one person in charge, so that the members can approach him or her about hosting the next tea. If your group is rather amiable, as is mine, we sometimes just wait until the next book club to decide who wants to host and choose a book.

Periodic movie nights, to watch film versions of the books can be really fun as well! It is always interesting to see how the film version never lives up to the book, but still allows you to gain some great insight into the story.

Book clubs are a great deal of fun and a wonderful way to encourage yourself and the rest of your family to turn off the T.V. and read! Even the slight amount of accountability of knowing that there will be a discussion is enough to spur on even a reluctant reader to finish a book. It also brings a great deal of enjoyment to share not only your own favorite books, but to experience books and authors your friends have enjoyed as well. Reading is an incredible pastime and should be enjoyed by all of us, so talk to your friends and get a book club started...you won't be sorry!

More of Tamera's Tea series:
Tea History
High and Low Teas
Napkin Etiquette
Starting a Tea Club

Wednesday, August 19, 2009

Reader's Questions: Nasturtiums and More

Though I do not believe that a plant will spring up where no seed has been, I have great faith in a seed. Convince me that you have a seed there, and I am prepared to expect wonders. ~Henry David Thoreau

Today I have three more garden questions and answers!

How I love rose geraniums! Years ago I found a recipe for rose geranium cake in The Herb Companion magazine. I have since lost it. Geraniums grow like weeds here in California so they are wonderful and easy to grow. I do not know where I could buy seeds for red clover though. Do you have any sources? ~Jacqui

I'm not sure it's the same cake recipe but I found one on the Herb Companion website that sounded yummy: http://www.herbcompanion.com/cooking/rose-geranium-savarin-cake.aspx

As far as the red clover seeds, you can usually find them in any seed catalog that has herb seeds or in the spring check the seed racks in larger garden centers and you should find it.

My Grandson had to do a growing project for junior school, so he came to me with a packet of seeds, Nasturtium, we had a great time sowing, then watching them grow, planting them out and now the full colour in August, My question:- The seed pods that are now forming all over the plants, can they be used as new seed for next year, as this (if it worked) would show Jack the full cycle If it could work could you tell me what to do with the seed pods, as I am sure there is more to it than just planting. ~Ron H. & Jack

You sure can! I've collected nasturtium seeds many times. Leave them on the plant and they should turn brown. They'll need to dry, so you can put them in a small basket or anything that won't trap in the moisture. When they look dry like the seeds you planted then you can keep them in an envelope until next season and plant them as you did before. This is such a cool idea!

We grew a bunch of eggplants and when we go to fry them they are very very bitter. Does anyone know how to get rid of that bitter taste and any good recipes for fixing eggplant? ~Selma

Eggplant should be picked early, while its smaller and the skin is still glossy. The seeds are what can cause bitterness if they're are too many. If you aren't sure how old it is, then try choosing eggplant that feels lighter-the heavier it is, the more seeds could be inside. The skin shouldn't be dull or spongy.

You can try cutting up or slicing the eggplant, sprinkling it with salt and allowing it to drain for an hour or so. After this you'll need to press the eggplant with paper towel to remove any water. Then use it as you planned. The link below has some good recipes to try with eggplant.

On OFL we have tips on growing and using chamomile:
http://oldfashionedliving.com/chamomile.html

~Brenda

Tuesday, August 18, 2009

Back to School Ideas

in just a few short weeks, sooner for others, our kids will be heading back to school. While I love my kids and usually hanging out with them is great, August is the month where boredom enters the picture and they start whining, nagging, and arguing. So back to school is not a sad event around here, it's a happy event, and not just for the adults. The kids look forward to school starting, seeing friends they didn't see over the summer, and getting fresh, new school supplies. This year, with the economy in the toilet, many people, myself included, are really having to pinch their pennies and watch how their back to school funds are divvied up.

I've included some tips here for saving on back to school shopping, at the end you will find some links to more information. Good luck with your back to school adventures!


Make a List
Be sure to have you child's school supply list with you when you head off to purchase supplies. Many, if not most schools have their own website now, and often times you can download the list right from their website. If not, call the school, they usually open back up around the first week of August, and they can get a list for you. Don't shop blind, it can be very costly!

Check What You Have on Hand
Whether it's back packs, school supplies, or clothing, be sure to go through what you have on hand before heading off to the store. Throughout the year, whenever standard supplies go on sale (three holed paper, spiral notebooks, No. 2 pencils, crayons, etc) I always grab a few as extras. I don't think I've ever experienced a school year (my oldest is 17 now) where the supplies you buy at the beginning of  the school year are all you will ever need. It's common to need more loose leaf paper, pencils (Oh the pencils!), erasers, and glue throughout the year for homework and projects. So be sure to take inventory of your stash before heading out.

Check Store Fliers
Stores know that they have competition, so they are famous for drawing you in and placing half the items you need at the best price, then pricing the rest at a little more than the competition. If you take some time and go through the fliers, you can find what you need and shop different stores to get the best prices. Obviously this is not cost effective if you spend more gas traveling to far away stores. 

Trade, Hand Me Downs, Yard Sales and Craigslist
A few ways to really save on clothes, shoes and backpacks is to trade with neighbors and relatives, hand down clothes to younger siblings, and check garage sales. Another option is craigslist. Craigslist is an online classified site, just follow their precautionary guidelines if you have never used their site before. 

See more great ideas on Conquering Back to School Spending

other articles you may like:
10 Ways to Save on School Gear
Back to School Gear For Less

Monday, August 17, 2009

August Garden Chores: Composting

Giving is a joy if we do it in the right spirit. It all depends on whether we think of it as "What can I spare? " or as "What can I share? "~Esther Baldwin York

Fall is around the corner, and it's time to start thinking about our yard and garden chores. Today I wanted to go over some composting tips. I know that most of us can't afford fancy tumblers and just want to compost in the simplest manner possible. Late summer is the perfect time to start a compost pile. It can be a loose pile, or you can use cheap fencing or scrap wood and make a 3 sided simple structure with the front open.

During the late summer and fall you will have an abundance of compost materials including leaves, grass clippings, straw, hay, vegetables, annuals and perennials that you've cut back. The key to using all of these materials is keeping the size small and using healthy clippings, nothing diseased. You should also avoid black walnut leaves, eucalyptus, poison oak, poison ivy and sumac.

You don't need an expensive chopper or shredder--use your lawn mower to go over the materials. Spread them on the ground and mow a few times til they are smaller. Do this with leaves and pine needles, plant clippings etc. Grass clippings may get rather ugly if they are placed in deep piles, so spread them out on a sunny day to dry out.

You also want to prepare your household refuse for the compost pile. It's not a big deal once you get used to doing it! Crush the egg shells, and cut up anything big like watermelon rinds into smaller pieces. Throw them in a bucket and add to the compost pile every few days. You can also add shredded or cut-up newspaper (no shiny ads) and cardboard. You don't want to add TOO much of either, but a couple buckets is fine. This also applies to wood ashes from your fire pit or fireplace.

Gardeners who work with their compost a lot will see results MUCH faster-- digging the pile-- making sure it has the correct amounts of materials etc. But, when you have kids, busy schedules, and too much going on it's not so easy. You can STILL have compost, it just takes longer! Start your pile-- get it ready on a nice cool weekend. Prepare everything as mentioned and even if you don't get to mix it up until spring it will eventually become compost!

On OFL we tips on a few fall garden chores you may want to think about:
http://www.oldfashionedliving.com/autumn-chores.html

~Brenda

Friday, August 14, 2009

Friday Recipes: Basil

Summer is drawing to a close, and that means that our herbs either need to be used up, dried or frozen for the fall and winter. You can even attempt to keep your plants growing inside. If you are looking to use up some of your thriving basil plant, we've put together a collection of great recipes. We've also included links to some tantalizing recipes out there in blogland. 

To begin, I couldn't help but to include one of my favorite articles on Old Fashioned Living. Brenda wrote this article several years ago and it's always popular, and I have to agree. Enjoy!


Basil: Everyone's Favorite Herb
by Brenda Hyde

If a person loves herbs, they love basil. It seems to be everyone's favorite herb and the recipes are endless that take advantage of this fresh and spicy leaf. I personally think if you can only grow two plants it should be a pot of tomatoes and a pot of basil. With these two plants and a few basic pantry items you can treat yourself to gourmet faire!

Growing Basil

Basil is an annual, and is easily grown from seed. There are over two dozen types of basil including lettuce-leaf which has large leaves, cinnamon basil and the purple leaved varieties. Basil is not frost tolerant at all, so be sure to plant after the soil has warmed completely. Though it needs full sun, it does need more moisture than some herbs, so be sure to keep it watered; especially in pots. You can bring basil inside as a window herb if you plant the seeds in the late summer in pots and bring inside to set in a bright and sunny window. Every year I grow my basil in a porch box outside my kitchen door. There is nothing better than walking out the door and snipping basil for a dish I'm cooking.

Using and Preserving Basil

Be sure to pinch the tops of your basil plants, and don't let them flower. This will basically stop it's growth. If it has started to flower pinch those off immediately. When you harvest the basil, cut off the stems, and then strip the leaves for your recipe. Be fairly gentle with them, and harvest JUST before you start your recipe. Some herb growers insist on the sweet basil for pesto, but experiment and use whichever variety you have growing.

Basil can be frozen, dried, or preserved in oil. It's delicious however you choose to preserve it. Basil is also available year round in most produce sections. Add leaves to salad or sandwiches with your lettuce, saute at the last minute with almost any vegetable and add to soups. It is also wonderful in herbal vinegars mixed with oregano and thyme.

Basil combines well with thyme, parsley, chives, garlic and oregano. Try it in pea or bean soups and or with vegetables such as eggplant. Basil is easily air dried by hanging small bundles or you can chop and add to water to create basil ice cubes! These can then be stored in resealable bags and added directly to your soups.

Whether you have room for a small plot of assorted basils or one pot, it's an herb worth growing! The following recipes will help you become familiar with using basil. 

Basil and Bread Salad

12 ounces day-old Italian or French bread
1/2 cup olive oil
1/3 cup balsamic vinegar
1/4 teaspoon salt
1/4 teaspoon pepper
3 large ripe tomatoes, chopped
1 large green pepper, chopped
1 pound mozzarella cheese, diced 1/2-inch
3 garlic cloves, minced
1 cup basil leaves, cut into slivers
12 romaine lettuce leaves

Cut bread into rough 3/4-inch cubes and place in a large bowl. In a small bowl, whisk together olive oil, vinegar, salt and pepper. Pour dressing over bread and toss to mix well. Add tomatoes, pepper, mozzarella cheese, garlic and basil. Mix gently. Arrange romaine leaves on a serving platter and spoon salad over leaves.


Basil Mayonnaise

This wonderful mayonnaise can be used for burgers, sandwiches, or to coat chicken before roasting.

1 cup loosely packed basil leaves
1/4 cup mayonnaise
1/2 teaspoon minced garlic

Blend in food processor or blender until smooth.


Basil and Tomato Bruschetta

12 pieces crusty Italian Bread, 1 inch thick
1/3 to 1/2 cup olive oil
2 large, ripe tomatoes, peeled, seeded and diced
2 tablespoons chopped fresh oregano
24-36 basil leaves, torn into small pieces
12 garlic cloves, peeled, and cut in half lengthwise
salt and pepper

Toast bread over a grill or a very hot oven of 425 degrees. Brown on both sides. Remove and brush with oil. In a bowl combine tomatoes, oregano and basil. Place cloves in separate bowl. Serve bread warm and rub clove on bread, top with mixture and sprinkle with salt and pepper.

I also sprinkle and with parmesan cheese and put under the broiler for just a minute to heat top.


Basil Puree

4 tablespoons olive oil
8 cups washed and dried basil leaves

Blend until pureed. Transfer to clean jar. Store in refrigerator. Each time you use it stir and then top with a thin layer of oil. It will keep one year by doing this. This is good on grilled chicken or fish, stirred into soups or mixed with sun dried tomatoes and broiled on bread.


Walnut and Basil Paste

1 cup lightly packed fresh basil leaves
3 cloves garlic, peeled
3/4 cup walnut pieces
1/4 cup grated Parmesan cheese
2 teaspoons red wine or herb vinegar
1 tablespoon olive oil

Place the basil in the work bowl of a food processor. With the motor running, drop in the garlic and process until basil and garlic are finely chopped about 15 seconds. Add the nuts, cheese, vinegar and oil. Process to make a rough paste, about 20 seconds. Smear evenly onto poultry, fish or vegetables just before grilling. Makes enough for about 2 pounds of poultry or fish.


Basil Butter

1 stick butter, softened
1 or 2 cloves garlic, minced
1 tsp. lemon juice
1/4 tsp. salt
pepper to taste
1 tablespoon finely chopped basil

Cream butter, beat in garlic and lemon juice. Mash in basil; season with salt and pepper. Place bowl in refrigerator to firm butter. For a nice, simple appetizer use room temperature butter on grilled pieces of baguette or French bread.


Lemon Basil Pork

1 12-ounce can frozen lemonade concentrate, thawed
1/2 cup basil leaves, cut into thin strips
4 tablespoons olive oil
2 cloves garlic
4 boneless pork chops 

Mix the first four ingredients. Reserve 1/4 cup of the marinade for basting. Pour the remainder of the marinade over the pork and refrigerate them for 1-2 hours, turning once in the process. Grill them for approximately 20 minutes. Turn the meat often, brushing a small amount of the reserved marinade on each time. You can also cut the pork into cubes and make kabobs, alternating onion and green pepper on the sticks.


Pasta With Fresh Basil

12 ounces penne or other larger pasta
1 cup fresh cooked peas or frozen peas, thawed
2 green onions, thinly sliced
1/3 pound lean prosciutto or leftover smoked ham, diced
1/4 cup chopped fresh basil
1/4 cup olive oil
3 tablespoons red-wine vinegar
3 tablespoons capers, optional
1/2 teaspoon coarsely ground pepper
1/2 teaspoon salt
grated peel of 1 lemon

Cook pasta according to directions; rinse under cold water and drain. In a bowl, combine the pasta with the peas, green onions, prosciutto, basil, olive oil, vinegar, capers, pepper, salt, and lemon peel. Toss until well-combined. Adjust seasonings to taste. Refrigerate until serving. Notes: This is such an easy salad and you can substitute fresh green beans that have been cooked until just tender or asparagus. Fresh is much better if possible. Also you can substitute red onion for the green.


Baked Zucchini and Basil

2 tbsp. olive oil
1 1/2 lbs zucchini (about 5 small), thinly sliced lengthwise
3 large Roma tomatoes, thinly sliced lengthwise
1 large sweet onion, peeled, halved, and thinly sliced
5 cloves garlic, minced
3/4 cup coarsely chopped fresh basil
1 tsp. salt
Ground black pepper to taste
1/2 cup grated Parmesan cheese

Preheat the oven to 375 degrees. Grease a 9-by-13-inch baking dish with a little olive oil. Layer in half the vegetables and basil. Season with salt and pepper. Add the remaining vegetables and basil and season again with salt and pepper. Drizzle the remaining oil on top. Cover the dish tightly with foil and bake for 1 hour. Uncover, add the cheese if desired, and bake 10 minutes longer. Let stand at 15- 20 minutes before serving. Notes: I think this is much better using a glass or other non-metal pan.


Basil Chicken Salad

1 cup leftover grilled Chicken Breast, diced
1 cup cooked rice
1/2 cup Red Grapes, halved
1/2 cup mayonnaise, light or regular
1/4 cup fresh basil, chopped
2 tablespoons chopped sweet onion
1/4 tsp. black pepper

Combine all ingredients and chill thoroughly. Recipe makes 4 servings.


Easy Pesto Pizza

One premade pizza crust
2 1/2 cups fresh basil leaves
4 cloves of fresh garlic, thinly sliced
olive oil 
1/2 cup grated Parmesan cheese
1 cup finely shredded mozzarella cheese
salt and pepper

Lay whole basil leaves over the surface of the crust, covering the entire pizza. Place the thinly sliced garlic on top of the basil leaves, spacing a couple of inches. Drizzle the olive oil over the entire pizza. Salt and pepper to season. Sprinkle the pizza with the Parmesan, then with the mozzarella. Place into a preheated 425 degree oven. Bake just until it's bubbly and slightly browned. Watch carefully. Serve warm.


Roasted Garlic and Basil Salsa

4 ripe tomatoes, cut into sections
2 tablespoon olive oil
4 cloves of garlic
1 tablespoon honey
2 sweet green peppers
2 jalapeno peppers or other hot peppers
2 tablespoon fresh lime juice
1 cup torn fresh basil leaves
1/4 of a sweet onion, chopped

Preheat the broiler or grill, Place the halved peppers and tomatoes on a baking sheet and broil until they blacken. You can do the same thing by placing them on a grill. Place the unpeeled garlic in a foil pouch (doubled) and drizzle with the olive oil. Either bake in the oven at 300 degrees for 30 minutes or cook on the grill, turning the foil pouch as it cooks. Meanwhile remove the peppers from the oven and place them in a bowl and cover with plastic or place them in a Ziploc bag and seal. Allow to cool to room temperature. Peel skin off of blackened vegetables and discard. Dice into one inch pieces. Once your garlic is cooked, slit the ends of the cloves, and smush out the garlic into the bowl with the peppers. Add the remaining ingredients. Add salt and pepper to taste. This salsa may set out for a couple hours at room temperature to join the flavors, or you can refrigerate for 2-3 days.


Basil and Gorgonzola Salsa

2 cups tomatoes, seeded and finely chopped
1/2 cup finely chopped green pepper
1/2 cup diced red onion
1/2 cup grated gorgonzola cheese
1/4 cup snipped fresh basil
1/4 cup snipped fresh parsley
2 tablespoons fresh lemon juice
1/2 teaspoon kosher salt (or regular)

Combine ingredients. Cover and refrigerate until needed. You can substitute another type of blue veined cheese.


Pasta and Basil Salad

3/4 cup uncooked spiral pasta or small shells
4 medium tomatoes, cut into thin wedges
5 green onions, thinly sliced
1 cup thin slices of seeded cucumber
1 cup fresh corn kernels
1 cup (packed) fresh basil leaves
1/3 cup plain yogurt
3 tablespoons low-fat mayonnaise
1 1/2 tablespoons fresh lime juice
2 garlic cloves, peeled

Cook pasta according to instructions until just tender. Rinse under cold water. Drain well. Place the pasta in a large bowl. Add tomatoes, green onions, cucumber and corn. Combine basil, yogurt, mayonnaise, lime juice and garlic in processor or blender until basil is finely chopped. Mix dressing with the pasta mixture and toss to coat. Add salt and pepper to taste. Serve or cover and refrigerate.


Below you will find some wonderful recipes where basil is the main event. To get the recipe, click the link at the end of each one.


Rotini with Walnut Pesto and Cream

2 cups fresh basil leaves, stems removed, washed and patted dry
2 cloves of garlic, crushed
1 cup walnuts
1 cup extra virgin olive oil
1 cup Parmesan cheese
Fresh ground pepper
1/3 cup heavy cream, warmed
1 pound rotini or other short pasta

To get the instructions click here


Eggplant & White Wine Polenta Stacks with Fresh Basil Sauce

step by step photos and detailed instructions!

To get the instructions click here


Lemon Basil Pasta Salad

1 pound of farfalle pasta (I use bowtie)
4 plum tomatoes, diced (I only used 3 for these pictures)
8 basil leaves, cut into chiffonade
1 lemon, juiced
1/4 cup extra-virgin olive oil
3 t salt
Fresh basil leaves for garnish

To get the instructions click here


Basil Ice Cream

2 cups whole milk
1/2 cup sugar, divided
1/4 cup fresh chopped basil
Pinch of salt
4 large egg yolks
1/2 cup chilled whipping cream

To get the instructions click here


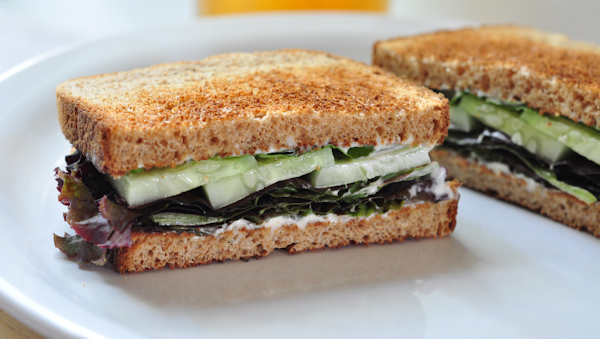
Cucumber Basil Sandwiches

whole wheat bread
mayo
lettuce
cucumber
pepper
basil

To get the instructions click here


Tomato, Basil, Feta and Garlic Pizza

Cooking spray
Corn meal
1 ball of pizza dough (I used store bought)
1 container of pizza sauce (Trader Joe's is really good)
1-2 cups of mozzarella cheese, shredded
1/4 cup of feta cheese crumbles (I used reduced fat)
1 large clove of garlic, minced
6-7 fresh basil leaves, chopped
Roma tomatoes, sliced
Sea salt and freshly cracked pepper

To get the instructions click here


Basil Pesto

¾ cup packed fresh basil leaves
1 tablespoon fresh parsley
1 clove garlic, thinly sliced
4 tablespoons butter, softened
¼ cup pignoli nuts (also called pine nuts)
¼ cup freshly grated Parmesan cheese
Salt and freshly ground pepper, to taste
¼ cup extra-virgin olive oil

To get the instructions click here


Lemony Peach Jam with Basil

5 cups of peeled sliced peaches
1/4 cup water
4 Cups sugar
juice and zest from 1 lemon
5 fresh basil sprigs

To get the instructions click here


Grilled Vegetable Pasta Salad

Grill the following vegetables, I brush them with a little olive oil and balsamic:

Zucchini
Eggplant
Red pepper
Yellow Squash

Chop up tomatoes and fresh basil.

To get the instructions click here

Lemon Cakes with Lemon Basil Syrup

For cakes:
1 stick (1/2 cup) unsalted butter, softened, plus 1 1/2 tablespoons, melted
3/4 cup matzo cake flour plus additional for dusting
2/3 cup plus 1/4 cup sugar
1/4 teaspoon salt
3 large eggs, separated, at room temperature for 30 minutes
2 tablespoons fresh lemon juice
1 tablespoon finely grated lemon zest


For syrup:
1 1/4 cups sugar
1 1/2 cups water
1 (4- by 1-inch) strip fresh lemon zest
1/2 cup fresh lemon juice
8 large fresh basil sprigs For whipped cream
1 cup chilled heavy cream

To get the instructions click here

Thursday, August 13, 2009

Collecting and Caring for Vintage Teacups

This article, written by Brenda, offers up some excellent advice on caring for vintage tea cups. 

by Brenda Hyde

I've been collecting teacups and teapots for at least 20 years now. I love them all, and look for bargains whenever I can, plus I splurge on new items now and then too. Today I have tips on the type of teacups you might find and a few on storage and care.

Porcelain or China?

When you see descriptions you find that porcelain and bone china is often mentioned. Porcelain is fired, then glazed, and fired again, which allows for a very refined dish. The designs are often very detailed and dainty. Bone china is made similar to porcelain, but finely ground bone ash is added to the clay. It's considered the strongest china and is very white. Fine china or fine ivory china is also very strong and similar to the bone china. Sometimes it will be strengthened with special treatments. Casual china is something other than bone or fine. It could be stoneware or earthenware, and you'll notice it's heavier, not as dainty.

Types of Teacups

There are many types of teacups available. The teacups we tend to use for the traditional afternoon tea are the footed cup and the flat teacup. The footed cup which usually has a saucer, can be used for coffee or tea. It has design where the cup is shaped at the bottom like a pedestal-- it will fit into the saucer, which should be indented.

Flat cups will also most likely have a matching saucer, but are flat on the bottom, instead of shaped. These can also be used for coffee or tea as well.

Often you'll see Demitasse cups and saucers, which are lovely, but traditionally are used for expresso or Turkish coffee. They are much smaller, and work well for childrens' tea parties. Tea and coffee mugs come in all shapes and sizes, and are especially nice for breakfast tea. They are informal and I love looking for whimsical designs to add to my collection.

Teacup Care

Never stack your cups more than two high, and if you have room, it's better not to stack. Place soft cloth between the cups if you do store them where they will be touching.

China shouldn't be washed in the dishwasher, especially if it's vintage. Newer designs will often say they are dishwasher safe, but if you plan on keeping them in the family and handing them down later, it's best to handwash with a gentle dishsoap and dry with a soft towel.

If you display your tea pieces be sure to keep them out of direct sunlight, and gently wash them twice a year or so. Better yet, it's nice to rotate the ones you use!

A note on metalllic trim, which is found on some teacups. These should never be placed in the microwave. If the trim tarnishes you can use a silver cleaner on it, but VERY gently.

One more note on collecting: Expensive tea sets are beautiful, but be sure if you spend the money to own a nice set that you use it. It doesn't truly become special until you have memories to go along with it!
