Wednesday, August 12, 2009

Reader's Questions: Onions, Goutweed & Tomatoes

Fairest of the months! Ripe summer's queen, the hey-day of the year with robes that gleam with sunny sheen. Sweet August doth appear. ~R. Combe Miller

I hope everyone is having a great week. We were without power for a couple of days while it was hot and VERY humid. My tomatoes and cucumbers were happy with the heat and the rain though! I have some more questions and answers today. Stay cool:)

I was told by a neighbor to take the ground away from my onions so that the onion is exposed to the sun. I tend to put ground around my onions to be sure the sun does not hit the onions. What is the correct method? ~Debbie

When it comes to garden methods it's often hard to say who is right and who is wrong. What I do know is that the bulb should be in soil that is loose enough to let it grow as it needs to. You shouldn't pile extra soil on top of the bulb, but I haven't read that you remove it either. I find it's better to start with good, fertile, loose soil, then let the onion "move" the dirt as it grows. Remember though, if you try something and it works for you, then keep doing it!

I have recently moved and have a question about what is growing in my flower beds. My friend calls it gout weed and says it is impossible to get rid of. Is this true? I was wondering if there is possibly a way to get rid of it and what is its original name? Any advice would be greatly appreciated. ~Chrystal

Gout weed is also known as bishop's weed, ground elder and snow on the mountain and its botanical name, which is Aegopodium podagraria L. I personally found it to be invasive and not that attractive, but many people use it as a low maintenance ground cover. I see it for sale all the time at nurseries. It spreads by rhizomes--stems under the soil. I was given some of it years ago by a relative and the next season pulled it all up. It wasn't that difficult to get rid of BUT it was a small patch and I watched for it, so when I saw it sprouting I pulled it up. Many of my neighbors grew it and it took over areas that weren't kept up. If you find it attractive and it's serving a purpose for you in your landscape, then leave it till next season and make a decision then. If you don't like it, then tear it out. I personally don't always listen to everyone that gives me advice. Sometimes I regret it, and other times I'm glad I followed my instinct. It's the fun of gardening!

I was wondering if - in your vast collection- you have a recipe for "Soufflé Tomatoes. Somehow, my recipes went missing and I would love to make them again. ~Lorraine

I'm not sure this is the type of recipe you meant, but I thought it was worth sharing!

Tomato Cheese Soufflé

Ingredients:
6 large ripe tomatoes
1/4 teaspoon kosher salt
1/4 teaspoon ground black pepper
2 tablespoons butter
2 tablespoons all-purpose flour
3/4 cup milk
1/4 teaspoon dry mustard
1/2 cup sharp cheddar cheese
1/2 cup chives
3 egg whites

Cut 1/2-inch from the top of each tomato scoop out seeds and core. Sprinkle the inside of shells with salt and pepper invert onto paper towels to drain. Heat butter in a small pan, over a medium to melt. Whisk in the flour until bubbly. Now gradually whisk in the milk. Heat while stirring, until the mixture is thickened. Stir in mustard, cheese, and chives. Mix well and continue to heat and stir until the cheese melts. Remove from heat and allow to cool slightly. Gently fold in the egg whites. Spoon into the drained tomato shells set into a greased baking pan bake at 400 degrees F for 15-18 minutes, until tops are lightly browned. Remove from oven and serve hot.

Helpful tips on those pesky fruit flies:
http://www.oldfashionedliving.com/fruitflies.html

~Brenda

Tuesday, August 11, 2009

Frugal Fun for Kids

These ideas come from an article I wrote several years ago. You can see all of the ideas here, but I thought some of these would be fun for those days that are just too hot to play outside!

Juice Carton Crayon Box

Wash and dry an empty cardboard juice carton and cut off the top. Using bits and pieces of masking tape, have the children tape up the entire carton, covering all sides, the more tape the better. Use crayons to color the masking tape box. The tape makes the box sturdier and will make a great crayon holder for their desk or dresser.

Coffee Can Stilts

Using two 1-pound coffee cans, turn each can upside down so that the plastic lid is on the bottom. Using a screwdriver, poke two holes, one on each side of the can. Using several strands of yarn braided or twisted together, or some rope, thread through holes in cans. Tie off inside the can. Cans can be decorated if you like.

Alphabet Catalog Collage

Using old toy, clothing, and plant catalogs, have the kids cut out colorful pictures that begin with a specific letter of the alphabet. Assign different letters to each child. Have them glue the pictures onto a piece of construction paper. Discuss the pictures afterward.

Cartoon Strip

make your very own cartoon adventure with crayons and a pad of paper. At the bottom of a pad, on each sheet, draw a figure (i.e., a dog). The first frame will be on the first page, second frame on the second page, and so on. Change the movement with each page. When you are finished, fan the pages with your thumb to see the show!

Bookmarks

Great for back to school or as a gift to someone you love. Make fun bookmarks with construction paper, markers, paints, and stickers. You can also use glitter, sequins, lace, doilies, buttons, and any other little bric-a-brac you have laying about. Cut strips from construction paper, painting the construction paper will make it sturdier, or you can visit the local library or office supply to have them laminated for longer lasting use. To complete the bookmark, attach a tassle make from strands of yarn.

See all 20 Fun Ideas That Won't Break The Bank


Monday, August 10, 2009

Your Summer Herb Harvest

It is better to have loafed and lost than never to have loafed at all. ~James Thurber

This is the time of year when you realize that you waited a long time for a good herb harvest and then you find you don't have enough recipes to use them all! My lemon balm is out of control and I really need to harvest it this week. My basil is ready to harvest too. Today I have some recipes that you can easily substitute herbs in for what you have on hand.

Herb Honey

Ingredients:
1 cup of honey
1/2 cup fresh herbs

Heat the honey gently over low heat--do not boil. A double boiler is good to use if you have one. Place the fresh herbs in a jar and pour the heated honey over them. Allow them to steep for about 10 days before using. You can use any of mints, lavender, rose petals, thyme, or any of the lemon herbs.

Herb Buttermilk Dressing

Ingredients:
2/3 cup buttermilk
1/3 cup olive oil
1 1/2 tablespoons lemon juice or herb vinegar
1/4 cup light mayonnaise
3 tablespoons chives, snipped
1 teaspoon fresh minced basil
1/2 teaspoon fresh minced oregano or marjoram
2 teaspoons ground black pepper
1/2 teaspoon salt
1/4 teaspoon granulated sugar or Splenda

Whisk the buttermilk, olive oil, lemon juice and mayonnaise in a small bowl until smooth. Blend in the other ingredients and place into a jar or container. Cover and chill for 30 minutes or longer. mixture is smooth and well blended.

Garlic Herb Blend

Ingredients:
2 tablespoons dried marjoram
2 tablespoons dried oregano
2 tablespoons dried rosemary
2 tablespoons dried leaf basil
1 tablespoon onion powder
1 tablespoon dried thyme
1 tablespoon salt
2 teaspoons garlic powder
1 teaspoon ground black pepper

Blend all together and store in a glass container. Use to season as you would salt and pepper on vegetables and meats. You can also mix into butter to make a great garlic herb bread.

Herb Oil

Ingredients:
1/4 cup fresh basil, very finely minced
1/4 cup fresh oregano, very finely minced
1/4 cup fresh thyme, very finely minced
1/4 cup fresh parsley, very finely minced
2 cups good olive oil

Add the oil to a small saucepan, and add the minced herbs. Bring to a simmer slowly, stirring occasionally. Remove from heat and stir a little bit longer. Steep the herbs while they cool for about an hour, then strain the oil. Refrigerate and bring to room temperature before serving with crusty bread.

We have more herb and spice blends on OFL!
http://www.oldfashionedliving.com/seasonings.html

Friday, August 7, 2009

Friday Recipes: Tea Treats

Summer is a wonderful time to host a tea party. If you are wondering what to serve along with your tea, Old Fashioned Living has numerous ideas that can help. We've outlined a few below, as well as included links to some tasty recipes out there in blogland. First, Brenda has put together some fabulous recipes, a summer tea menu in fact, that I know you will love:

A Summer Tea Menu
By Brenda Hyde

Near the end of the summer, when it's just starting to cool off, is a lovely time to give a small tea party with family and friends. Pick a bouquet from your flower gardens for your centerpiece. If you have a vegetable garden, send some of your harvest home with your guests along with a small bouquet. The cherry recipes use dried cherries, but if you have fresh cherries in your area be sure to place some in a pretty bowl for guests.

Herbed Quiche Appetizer

10 eggs
2 cups cottage cheese
1/2 cup flour
1 teaspoon baking powder
1/2 teaspoon seasoned salt
1 pound Swiss cheese, grated
1 can sliced mushrooms (8 oz.)
1/2 cup butter -- melted
1 tablespoon minced herbs---oregano, parsley, minced
garlic, basil, chives, chervil, etc.
salt and pepper to season

Preheat oven to 400 degrees. In large bowl, beat eggs, cottage cheese, flour, baking powder and seasoned salt. Stir in cheese, mushrooms, butter, salt, pepper and the herbs. Pour into a 13 x 9 x 2 inch glass baking dish. Bake uncovered 15 minutes at 400 degrees . Reduce heat to 350 degrees and continue baking for 35-40 minutes. Cut into bite-size squares. Serve hot or cold.

Mini Onion Tarts

1 1/2 cup butter cracker crumbs
1/3 cups butter
2 cup chopped sweet onion
3/4 cup milk
2 eggs
3/4 tsp. salt
3/4 cup shredded cheddar cheese
1 tsp. sweet paprika
1 tsp. minced fresh parsley

Combine crumbs and two-thirds of the butter in a bowl and mix well. Press the mixture on the bottom and up the sides of mini muffin tins. Heat remaining butter in a skillet, over medium heat, add onions and sauté for 10-12 minutes, until tender and just beginning to caramelize. Divide onions among muffin cups. Now combine milk, eggs, and salt and whisk well. Pour over the onions into muffin cups. Divide the grated cheese between muffin cups and sprinkle with paprika. Bake at 350 degrees, until a toothpick inserted in center comes out clean. Remove from oven and gently remove from muffin tin. Garnish with minced parsley and serve warm.

Cherry Scones

1/3 cup dried cherries
1/2 cup boiling water
1 1/2 cup flour
1 1/2 tablespoon granulated sugar
1/2 tablespoon baking powder
1/3 cup Half and Half -- plus 1 tablespoon
1/4 teaspoon cream of tartar
1/4 cup butter, room temperature
1 egg, separated
1/4 cup sour cream
1/4 teaspoon salt
3/4 teaspoon almond extract

Soak cherries in hot water for 10 minutes and then drain and set aside. Combine the dry ingredients in a large bowl. Using a pastry blender, cut in the butter until mixture it resembles coarse crumbs. Set aside. In a small bowl, mix together the egg yolk, sour cream, cream and extract. Add the sour cream mixture to the flour mixture and stir until a soft dough forms. Mix in the cherries and then knead the dough lightly on a floured surface just until dough can be handled. Shape dough into a ball and pat into a 6-inch circle on a greased baking sheet. Cut into six wedges and brush with beaten egg white and then sprinkle with sugar. Bake at 400 degrees F. for 15 to 20 minutes.

Cherry Cheese Spread

1 cup dried cherries
1 cup water
2- 8-ounce packages cream cheese, softened
1 tablespoon fresh lemon juice
1/4 teaspoon dried thyme
1/4 teaspoon lemon zest

In a small heavy pan simmer the dried cherries in water until water is reduced to about a tablespoon. Remove pan from the heat and cool. In a medium sized bowl, beat the remaining ingredients together with the cherries and water once they have cooled. Serve with scones or crackers.

Cherry Tea

6 cups water
1/4 cup maraschino cherry juice
4 tea bags---black or green tea
1 teaspoon lemon juice

Boil the water, remove from heat and add the tea bags. Brew for 5 minutes. Pour into a teapot with the juices. Serve in cups warm, or over ice. This is easily doubled.


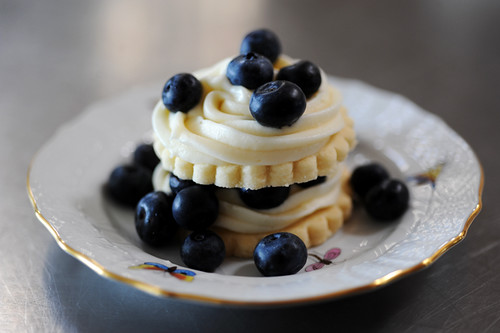
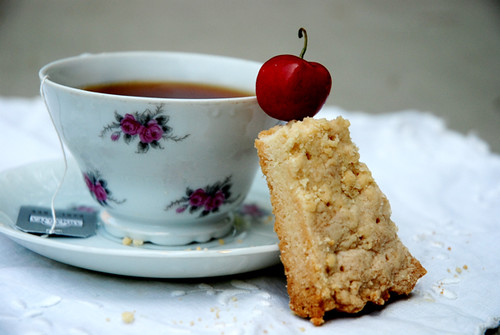
Shortbread Cookies

2 sticks plus 2 tablespoons softened butter
1 cup sugar
2 cups flour
scant 1 cup (a little less than 1 cup) of corn starch


To get the instructions, click here


Grown-Up Southern Tea Room
Chutney Chicken Salad for Two


1/2 of a stalk of celery, chopped
1 thick slice of red onion, chopped
1/2 of a small apple, peeled and chopped
2 tablespoons of chopped pecans
12 red seedless grapes, cut in half
2-3 tablespoons of mayonnaise
2 tablespoons of mango chutney (like Major Grey's)
Salt and pepper, to taste
2 cups of chopped cooked chicken
Four slices of fresh white or whole wheat bread, or two large croissants
Additional mayo for bread
Curly lettuce and tomato, optional

To get the instructions, click here


Cinnamon Chip Scones

2 c. flour
1/3 c. sugar
2 tsp. baking powder
1/4 tsp. salt
1/4 tsp. nutmeg
1/3 c. butter
1/2 c. cinnamon chips, heaping
1/2 c. heavy cream
1 egg
1 tsp. vanilla

To get the instructions, click here


Cherry Tassies

1 1/4 cups butter, softened
2 1/4 cups powdered sugar
1 tsp. baking powder
1/2 tsp. salt
1 tsp. peppermint extract
1 tsp. vanilla
1 egg
2 1/2 cups all-purpose flour
1/2 cup finely crushed striped round peppermint candies (about 18)
48 red maraschino cherries or liquor-flavored maraschino cherries with stems, drained
Coarse sugar

To get the instructions, click here

See the rest of their tea party menu, including Cucumber sandwiches, scones and other goodies here


Sour Cherry Financier

1 stick unsalted butter
1 cup powdered or caster sugar
1/2 cup almond meal
5 tablespoons all purpose flour
1/2 teaspoon salt
4 large egg whites, room temperature
1 teaspoon pure almond extract
24 sour cherries, pitted from the bottom so the stem remains attached (process described above)

To get the instructions, click here


Strawberry Tea Bread

3 cups flour
1 teaspoon baking soda
1 teaspoon salt
1 1/2 teaspoons of cinnamon
2 cups sugar
4 well-beaten eggs
1/2 cup canola oil
1 teaspoon vanilla
2 cups of fresh or frozen (thawed) strawberries

To get the instructions, click here


Creamy Date Nut Filling

5 packages of cream cheese softened(20 oz.)
1/2 tsp. salt
2 c chopped walnuts
2 2/3 c chopped dates

To get the instructions and to see other fillings, click here


Coconut Cherry Petits Gateaux

1/2 cup (100gr) sugar
2 eggs
1/2 cup (125ml) coconut milk
2 tablespoons (30gr) unsalted butter, melted and cooled
1/4 teaspoon coconut extract
1 3/4 cups (220gr) all purpose flour
2 teaspoons baking powder
1 cup cherries, pitted and halved
3 tablespoons raw pumpkin seeds, chopped

To get the instructions click here


Pastry Cream Filled Fillo Shells

1 large box instant chocolate pudding
1 1/2 cups heavy whipping cream
1/2 cup milk
fruit for garnish (such as mandarin oranges cut in half, raspberries, strawberry slices, banana slices, etc)

To get the instructions click here


Classic Shortbread

2 cups all purpose flour
1 1/4 teaspoons coarse salt
1 cup (2 sticks) unsalted butter at room temperature, plus more for the pan
3/4 cup confectioners' sugar

To get the instructions click here


Lemon Cheesecake Bars

Crust:
1 stick butter, softened
1/4 cup powdered sugar
1 teaspoon vanilla
1 cup flour
Cream Cheese Filling:

8 ounces cream cheese, softened
1-1/2 cups powdered sugar
1 egg
1 teaspoon grated lemon rind
Lemon Curd:

4 egg yolks
1 tablespoon corn starch
3/4 cup sugar
3/4 cup water
1/4 cup fresh lemon juice
2 teaspoons lemon zest
2 tablespoons butter

To get the instructions click here


Wednesday, August 5, 2009

Buying Fabric on the Internet

A friend of mine, Mary Wilkins, wrote this article on what to look for when buying fabric over the internet. She has some great tips and Brenda and I appreciate her wisdom! Thanks Mary!

The World Wide Web - it is an integral part of our lives. The possibilities and opportunities are endless. Now our shopping has taken on a whole new dimension. We can buy basics, gifts, even a new car over the Internet. However, there are a few things to consider before you make any purchase online. While buying fabric can be fun helping our stash grow almost overnight, the buyer should beware. When you are contemplating the purchase of fabric from an online site, consider the following factors.

1) Can you see an actual swatch of the fabric online? If so, remember that color variations take place from one monitor to another. How the fabric colors appear to you may not be what it really looks like at all.

2) Is the fiber content, width, price and washing instructions all available? These are all important things you should want to know. Ask about catalogues and if swatches are available to be mailed to you. Better safe than sorry.

3) Do they have a return policy clearly stated? If not, then ask.

4) Does the site have an email address that really works? Do they have an address and phone number that is active. Send an email query and find out. If you do not get a reply, and you couldn't find anything in your spam or junk email foders, you want to consider purchasing elsewhere.

5) Does the site have a secure order form to handle credit card transactions? If not, do not order online. Never send a credit card number through regular email. This valuable information can be picked up by someone less than honest.

6) Make sure you know about cross-border shopping if you are ordering out of your own country. Make sure it is very clear what charges will be billed to you. If you are Canadian, you will be charged the applicable tax for your province, duty, delivery and border handling fees. Make sure you know what their delivery charges are and approximately how long it will take to receive your fabric.

The postal system is great to a certain degree. I have had fabric delivered half way around the world in 10 days or less and I have also had orders to the next county take 3 weeks. It's far from perfect, but then again, what is?

7) Make sure you insure your fabric order. This might cost you a dollar or two, but it is worth every cent. When your order leaves the vendor, they have no control over the route your package takes or where it ends up. If you insure your order the seller receives a tracking number on their postal receipt from the post office. If your order becomes lost, they can start a trace to find your order. This is a long drawn out procedure that may or may not yield results. If your insured package is not found, then insurance claims are filed and you go from there.

But, if you do not insure your package, tough luck for you. You have lost your money, the vendor has lost his fabric and the post office will not take any responsibility for the situation. It's a lose-lose situation--all because you did not spend one dollar.

This is a broad overview of what you should be aware of when ordering fabrics online. I know this seems like a lot to remember, so print this column and keep it close by your computer for the next time that you just have to have that special fabric.

On Old Fashioned Living:

Reader's Garden Questions Answered

The summer night is like a perfection of thought. ~Wallace Stevens

I hope your week is going well. We finally got some good rain here, which we needed. Our lawn is actually crunchy when we walk on it! Today I have some great reader's questions with answers.

When the plumes die off astilbe, do you leave them on the plant till spring, or trim the dead plumes off when they are thru flowering? Then in the spring, do you cut the whole plant to the ground? ~Ginny

After the first bloom you can cut just the flowers off and this will encourage them to bloom again. Many people recommend leaving the blooms to go to seed for the birds in the winter. I think you could do this with the second blooms, and cut the first bloom. They make a neat looking winter landscape plant too with the seed heads left on. Any dead foliage can be cut in the spring.

I planted my first butterfly bush this spring. It was growing beautifully, now in the last few weeks it is turning yellow in stem of the leaf.I have giving it plant food 2 time this season, it is in full sun, mulch is around the plant, and the plant looks ready to bloom, but I think leaves will be dead before that. Any advice would be appreciated. ~Hummingbirdcole.

It could be spider mites, and if so, try spraying the leaves, especially the underside, with a soap spray. Catherine, the Herb Lady, had shared her spray method and I put it here: http://www.oldfashionedliving.com/spray.html

Also, make sure it's getting water, but not TOO much-- you don't want it wet all the time, but don't let it get bone dry either. I wouldn't feed it any more this season, just try the spray.

I noticed "pod" things on the flower stock of my bearded iris after it was done blooming. Can these be used to propagate the plant? If so, how? ~Betty

Yes, those are seed pods, and they can be used to grow more iris. When they are starting to turn brown on top, and if you pinch them with your fingers they crack instead of give, then you can harvest them. You don't want to do it too soon, or they won't be ripe enough, but if you wait til the pods split they will be gone into the soil and the wind. The seeds are tiny, and you can do a few different things with them. Either plant them in the soil, pots, or if you want a lot of them, use flats. Use good potting soil and plant about 3/4 inch deep in all cases. Outside they need to planted before winter in the fall. They will germinate the next spring. If you want to try them in pots in the spring then transfer them, that's okay too. Store the seeds in paper envelopes. I didn't notice seeing how long it takes for new plants to grow, but I think as with daylilies, it could be a couple of years.

Speaking of daylilies, you can do the same thing with the pods on your plants too. Many people refrigerate these for 3 or 4 weeks then plant the seeds a 1/4 inch deep in pots or flats. If you chill them the germination time could be as soon as a week, or 3-4 weeks without chilling. You can plant them directly in the garden too. The seedlings can be transplanted into the garden when they are about 6 inches tall. Harden them off first by giving them a few hours of sun a day, then increasing the time as the days go by.

Depending on what variety of lily or iris you started with, the seeds may end being a completely different color. But, it's a fun experiment and one to get the kids involved in!

Learn to make your own pesto!
http://oldfashionedliving.com/pesto.html

Monday, August 3, 2009

Herb Tips and Recipes: Clover and Geraniums

The summer night is like a perfection of thought. ~Wallace Stevens

Red clover was one of my favorite wildflowers as a child. I thought they were so pretty, but little did I know that they are also an exceptional helper for the soil and for us. Red clover is "green manure", meaning it helps the soil and is very good for compost piles as it contributes, potassium, calcium and phosphorus. It also makes a nice tea that is said to relieve menopausal symptoms, among other things. You can grow it yourself for tea, or harvest it from fields as long as you know no pesticides or chemicals were used.

Red Clover Tea
From "The Wild Flavor" by Marilyn Kluger

Ingredients:
1 Handful fresh red clover blossoms, w/a few leaves
Lemon
Honey
Optional:
Fresh mint leaves
-and/or-Several dandelion leaves

Put the blossoms and leaves into a 2-cup earthenware teapot. Fill teapot with boiling water, cover, and infuse for 5 to 10 minutes over very low heat. Set the pot on a trivet over the burner, if necessary, to protect it from breaking. Strain into a hot cup, add a twist of lemon and sweeten with honey. Some fresh mint leaves and/or several dandelion leaves can be used with the clover blossoms.

Note: Red clover blossoms may be dried to use for tea. Spread the blossoms out into a single layer on a tray and dry them in the sun. Use less of the dried flowers, 1 to 1 1/2 tsp. to 1 cup of water, to make the tea. Yield: 2 cups.

Pelargonium or scented geraniums are wonderful to use in beverages. They are usually infused, rather than chopped or minced into the dish. Rose is my favorite.

Rose Geranium Lemonade

Ingredients:
1/2 cup granulated sugar
6 cups water
8 rose scented geranium leaves
1/2 cup freshly squeezed lemon juice

Bring the sugar and 2 cups of the water to a boil in a small pan, stirring occasionally. Add the geranium leaves, cover, and remove from the heat. Allow this to steep for 30 minutes. Strain into a 2 quart pitcher. Add 1/2 cup fresh lemon juice and 4 cups of cold water. Chill and serve over ice. Makes a quart and 1/2.

We have tips and recipes for on OFL for making herb sugars:
http://www.oldfashionedliving.com/herbs6.html

~Brenda